Introduction
What is a Contour Brush?
A contour brush is a makeup tool specifically designed to define and enhance the natural contours of the face. Unlike regular brushes, contour brushes have a unique shape and bristle arrangement that make them ideal for sculpting and shading. These brushes come in various shapes and sizes, each tailored to different areas of the face. The main purpose of a contour brush is to apply makeup products, such as contour powders or creams, in a way that mimics shadows and highlights, creating the illusion of more defined and sculpted facial features. Whether you’re aiming to enhance your cheekbones, slim down your nose, or define your jawline, a contour brush is essential for achieving a flawless, professional-looking finish.
Importance of Contouring in Makeup
Contouring has revolutionized the makeup world, becoming an essential technique for anyone looking to enhance their facial features. The importance of contouring lies in its ability to transform the face by adding dimension and definition. Unlike traditional makeup application, which focuses on adding color, contouring uses shadows and highlights to sculpt the face. This technique can create the illusion of higher cheekbones, a slimmer nose, a sharper jawline, and a more balanced facial structure. For many, contouring is a confidence booster, allowing them to enhance their natural beauty and achieve their desired look. Whether for everyday wear or special occasions, contouring is a powerful tool in any makeup routine.
History of Contouring
Origin and Evolution
Contouring is not a new phenomenon; it has been a part of makeup artistry for centuries. The technique originated in the theater during the 1500s, where actors used it to accentuate their facial features under harsh stage lighting. By applying dark and light makeup, they could create shadows and highlights that made their expressions more visible to the audience. Over time, contouring evolved and found its way into the fashion and film industries. In the early 20th century, makeup artists began using contouring techniques on Hollywood stars to enhance their features on camera. Today, contouring is a staple in both professional and everyday makeup routines, thanks to its widespread popularity and the influence of social media.
Influence of Celebrities and Makeup Artists
The resurgence of contouring in recent years can be largely attributed to celebrities and makeup artists. Figures like Kim Kardashian and her makeup artist Mario Dedivanovic have popularized the technique by showcasing dramatic before-and-after transformations. Their influence, combined with social media platforms like Instagram and YouTube, has made contouring accessible to a global audience. Makeup artists and beauty influencers have created countless tutorials, breaking down the steps and making contouring achievable for everyone. This democratization of contouring has empowered makeup enthusiasts of all skill levels to experiment with and master the technique, making it a cornerstone of modern beauty routines.
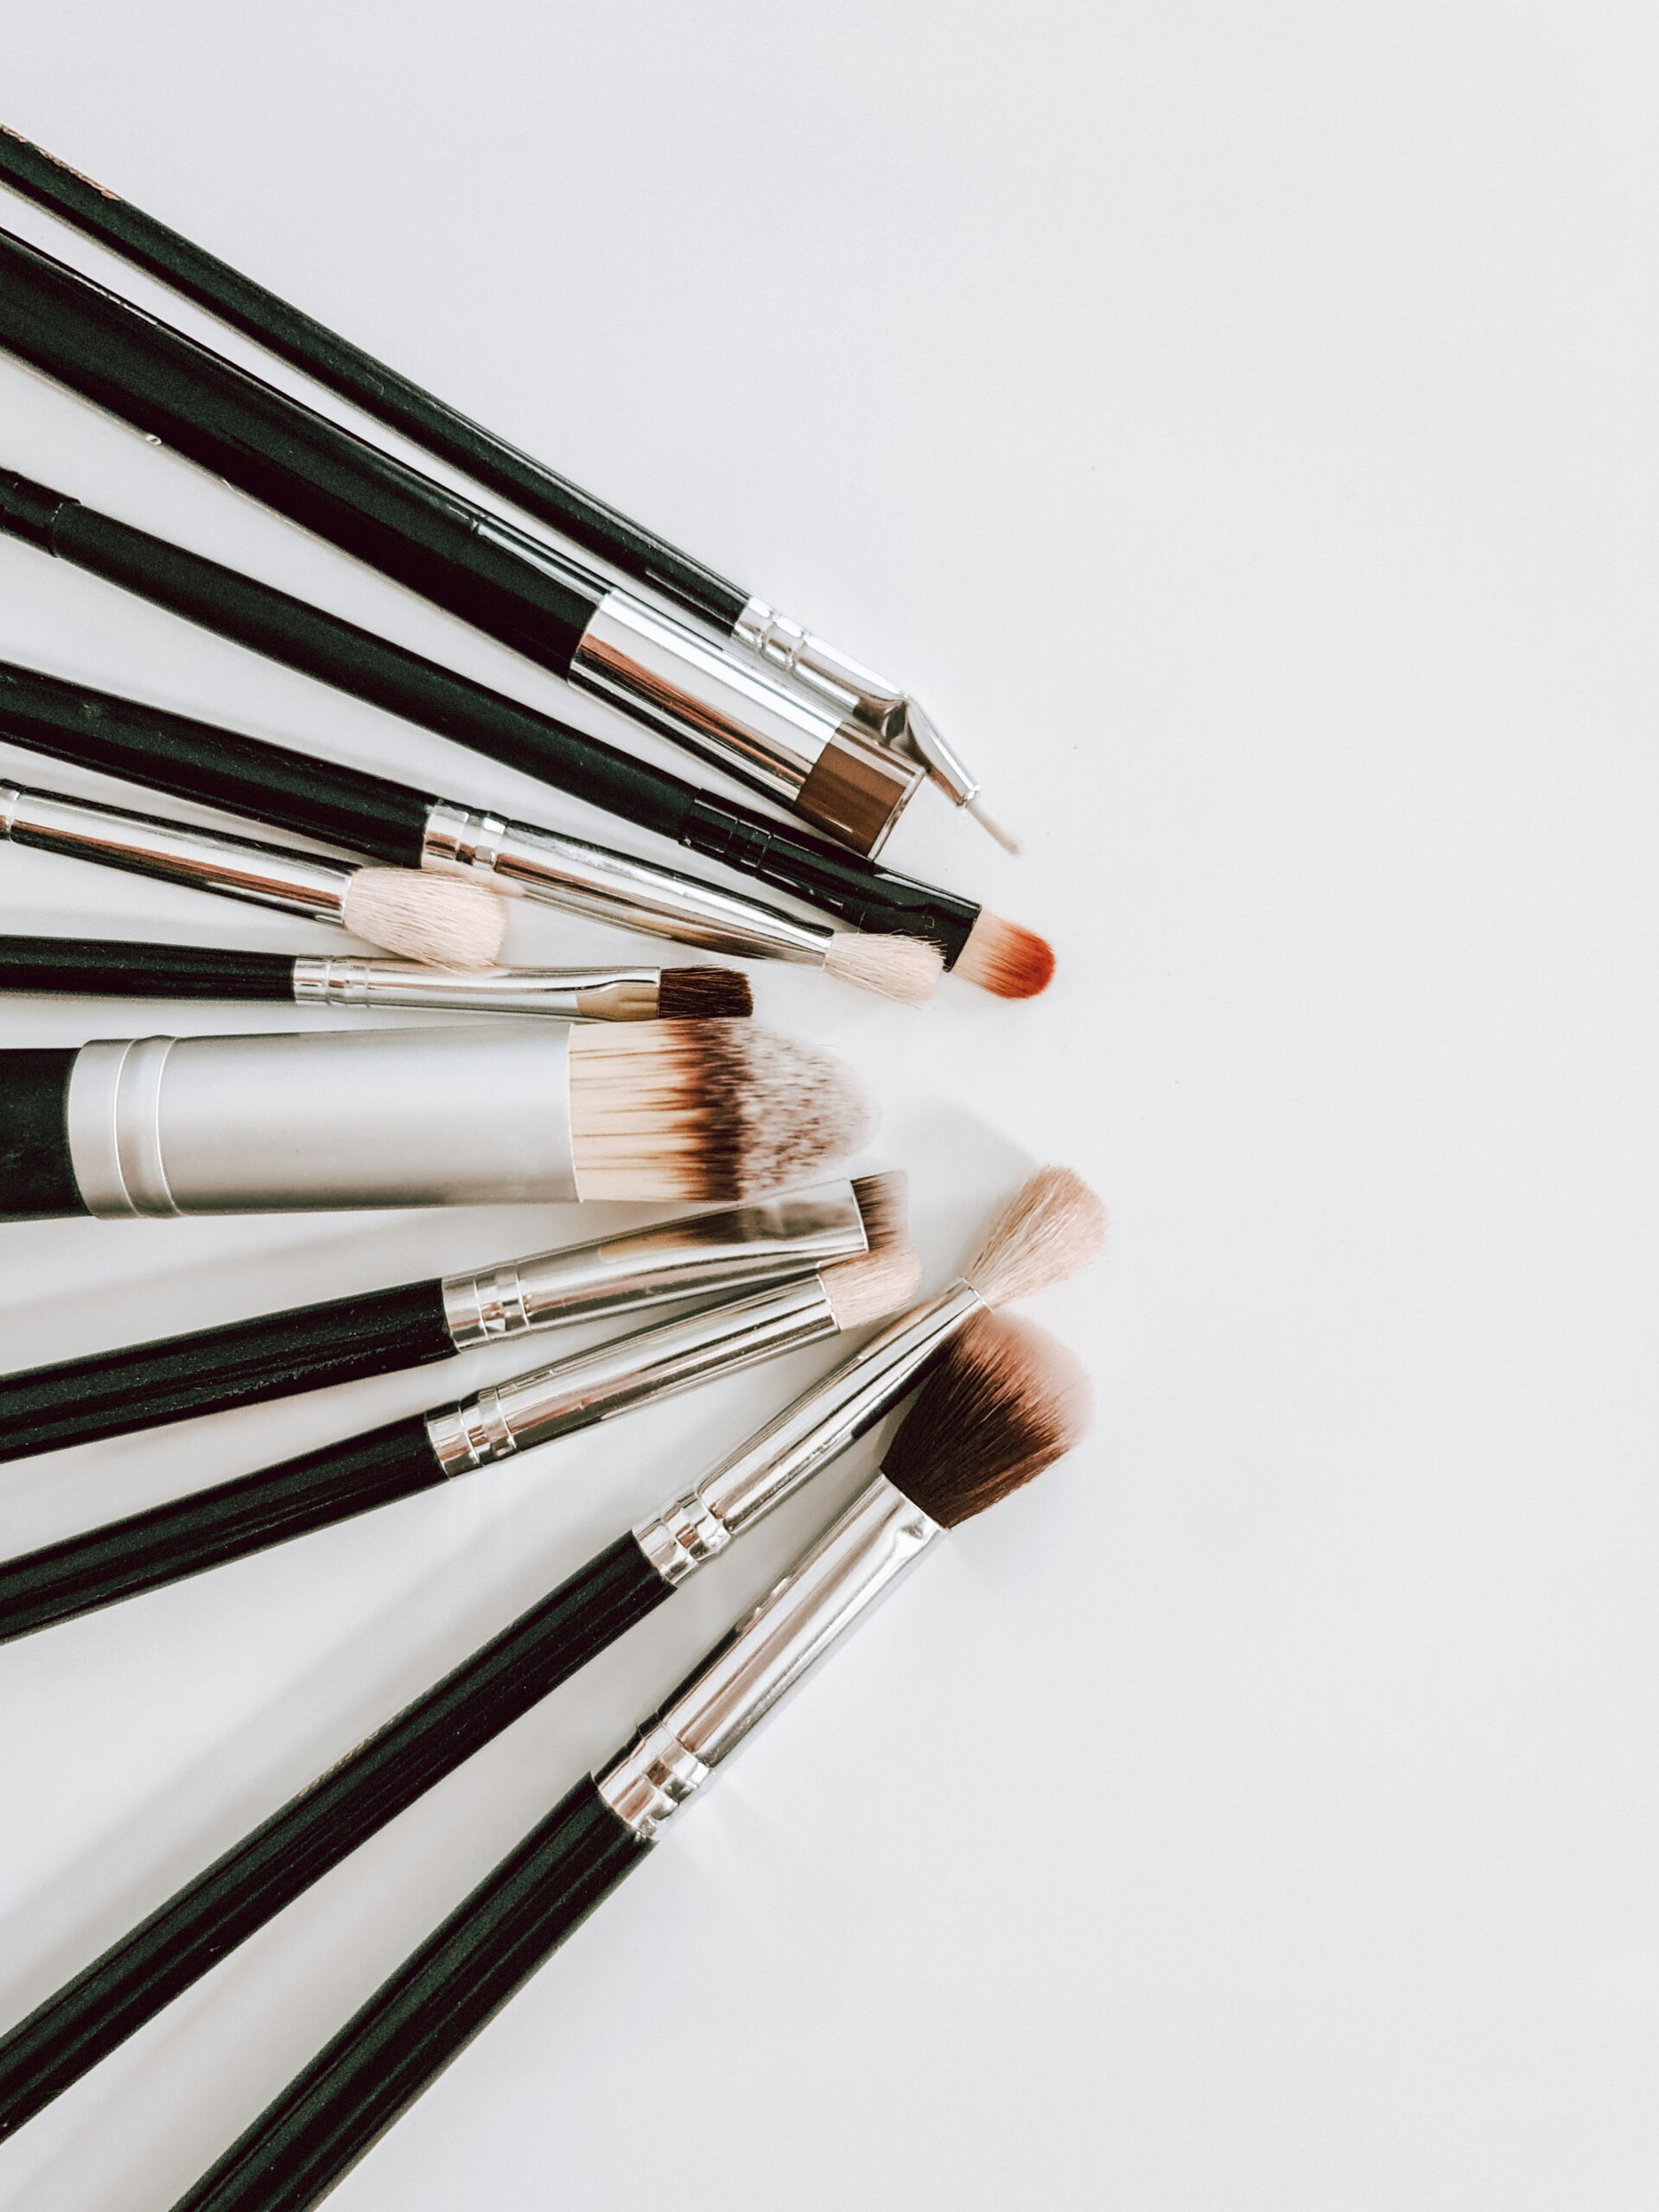
Types of Contour Brushes
Flat Contour Brush:
Features
A flat contour brush is characterized by its flat, densely packed bristles. This design allows for precise application, making it ideal for creating sharp, defined lines. The bristles are usually short and stiff, providing control and accuracy. The flat contour brush is perfect for applying contour products to specific areas, such as the sides of the nose or the hollows of the cheeks.
Best Uses
The flat contour brush is best used for targeted contouring. Its precise shape makes it easy to apply contour product exactly where you need it, allowing for detailed definition. This brush is particularly effective for creating a chiseled look on areas like the nose and cheekbones. For the best results, use the flat contour brush with cream or powder contour products, and blend well to avoid harsh lines.
Angled Contour Brush:
Features
An angled contour brush has bristles cut at an angle, which makes it perfect for sweeping contour products along the natural curves of the face. The angled design allows the brush to hug the contours of the face, making it easier to apply the product smoothly and evenly. This type of brush typically has medium-density bristles, providing a good balance between precision and blending capability.
Best Uses
The angled contour brush is versatile and user-friendly, making it an excellent choice for beginners and professionals alike. It is ideal for contouring larger areas, such as the cheekbones, jawline, and forehead. The angled shape helps to create a natural, blended look, as it follows the natural contours of the face. For best results, use this brush with powder contour products and blend using circular or sweeping motions.
Tapered Contour Brush:
Features
A tapered contour brush features a pointed tip with a wider base, allowing for both precision and blending. The bristles are usually soft and flexible, which helps in applying the product smoothly and evenly. The tapered shape makes it easy to reach smaller areas of the face, providing detailed control over the application.
Best Uses
The tapered contour brush is ideal for contouring smaller, more detailed areas of the face, such as the nose, temples, and the hollows of the cheeks. Its pointed tip allows for precise application, while the wider base helps in blending the product seamlessly. This brush works well with both cream and powder contour products, making it a versatile tool in any makeup kit.
Sculpting Contour Brush:
Features
A sculpting contour brush often has a slightly curved shape and densely packed bristles, designed to fit into the natural contours of the face. The bristles are usually firm yet flexible, providing both precision and blending capability. This brush is designed to create deeper shadows and more dramatic contour effects.
Best Uses
The sculpting contour brush is perfect for achieving a more dramatic, sculpted look. It excels at creating deep shadows and defined lines, making it ideal for evening makeup or photo-ready looks. This brush is best used with powder contour products and should be blended well to avoid harsh lines. The sculpting contour brush is a favorite among professional makeup artists for its ability to create high-impact looks.
How to Choose the Right Contour Brush
Considering Face Shape
When choosing a contour brush, your face shape is a crucial factor to consider. Different brushes work better for different face shapes, helping to enhance and balance your features. For example, those with round faces may benefit from an angled brush to create more defined lines and angles. On the other hand, individuals with more angular faces might prefer a flat brush for precise application. Understanding your face shape and how contouring can enhance it will help you select the right brush for your needs.
Brush Material and Quality
The material and quality of the brush bristles play a significant role in the performance and longevity of the brush. Synthetic bristles are often preferred for cream and liquid products, as they do not absorb the product and are easier to clean. Natural bristles, made from animal hair, are better suited for powder products due to their superior blending ability. Investing in a high-quality brush not only improves the application and blending of contour products but also ensures that the brush will last longer with proper care.
Personal Preferences and Skill Level
Your personal comfort and skill level are also important factors when choosing a contour brush. Beginners might find angled brushes easier to use, as they are more forgiving and help to blend the product seamlessly. More experienced users might prefer flat or tapered brushes for greater control and precision. Additionally, consider the handle length and weight of the brush, as a comfortable grip can make a significant difference in the ease and accuracy of application.
Step-by-Step Guide to Using a Contour Brush
Preparing Your Face
Before you start contouring, it’s essential to prepare your face. Begin with a clean, moisturized face to create a smooth base for your makeup. Apply your foundation and concealer as usual, ensuring an even skin tone. This will provide a blank canvas for your contouring and help the contour product blend seamlessly into your skin.
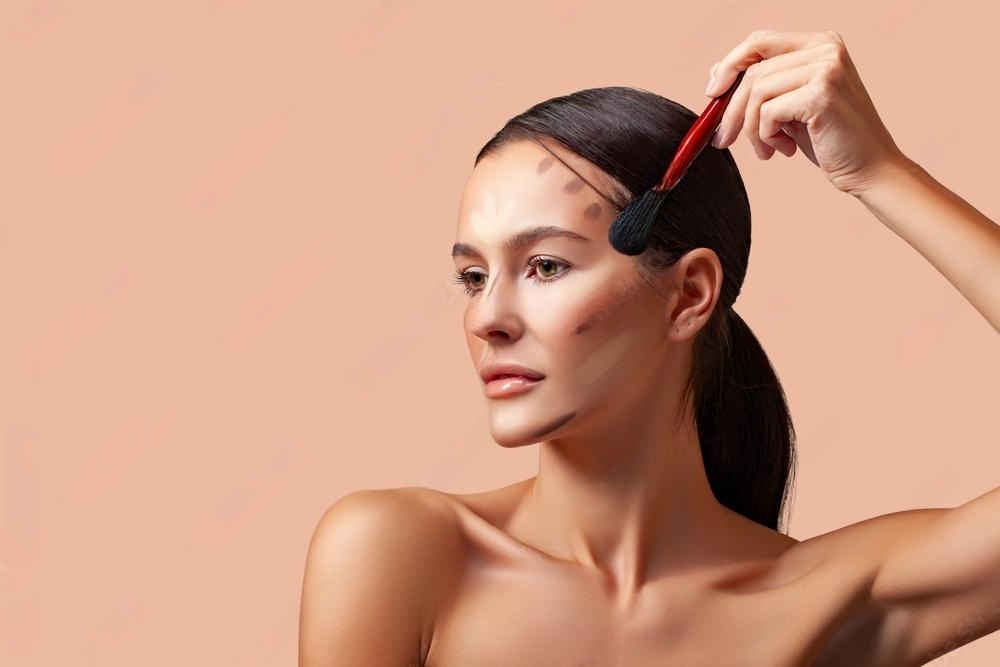
Applying Contour Powder or Cream
Dip your contour brush into the contour product, whether it’s powder or cream. Tap off any excess product to prevent applying too much at once. Apply the contour product to the areas where you want to create shadows: under the cheekbones, along the jawline, the sides of the nose, and the temples. Use a light hand and build up the product gradually to avoid over-contouring.
Blending Techniques
Blending is the key to achieving a natural-looking contour. Use small circular motions to blend the contour product into your skin. This helps to soften any harsh lines and create a seamless transition between the contour and your natural skin tone. A well-blended contour looks like a shadow rather than a streak, enhancing the natural structure of your face.
Finishing Touches
After blending your contour, add finishing touches to complete your look. Apply highlighter to the high points of your face, such as the tops of your cheekbones, the bridge of your nose, and your cupid’s bow. This will add dimension and bring your contouring to life. Finally, set your makeup with a setting spray or powder to ensure it lasts all day.
Common Mistakes to Avoid
Over-Contouring
It’s really easy to go overboard with contouring, but you gotta hold back a little. Start off with just a small amount and build it up slowly. Too much contouring can make your face look heavy and unnatural, so keep it subtle and blended for the best look.
Wrong Brush Selection
Using the wrong brush can make contouring difficult and affect the final result. Ensure you choose a brush that suits your face shape and the contour product you’re using. For example, an angled brush is great for beginners and for larger areas, while a flat brush is better for precise application.
Improper Blending
Improper blending is another common mistake. Harsh lines and streaks can ruin the effect of contouring. Take your time to blend the product well, using circular motions to create a seamless transition between the contour and your natural skin. A well-blended contour looks natural and enhances your features subtly.
Caring for Your Contour Brush
Cleaning Techniques
Keep your contour brush in tip-top shape by giving it a good clean every so often. Use a gentle brush cleaner or a bit of mild soap and warm water to thoroughly cleanse the bristles. Rinse it well and gently squeeze out any excess moisture. Then, lay the brush flat on a clean towel and let it dry fully before using it again.
Storing Tips
Proper storage of your contour brush helps to maintain its shape and longevity. Store your brush in a dry, clean place, preferably in a brush holder or a makeup bag. Avoid keeping it in damp or enclosed spaces, as this can promote mold growth and damage the bristles.
When to Replace Your Brush
Even the best brushes don’t last forever. If your brush starts shedding, losing its shape, or feels rough on your skin, it’s time to replace it. Using a worn-out brush can affect the quality of your makeup application and potentially irritate your skin.
Popular Brands and Recommendations
High-End Brands
For those looking to invest in high-quality contour brushes, several high-end brands offer excellent options. Brands like MAC, Sigma, and Fenty Beauty are known for their durable, professional-grade brushes. These brands provide a range of contour brushes that cater to different needs and preferences, ensuring you get the best results.
Affordable Options
If you’re on a budget, there are plenty of affordable options that deliver great performance. Brands like Real Techniques, E.L.F., and Morphe offer high-quality contour brushes at a fraction of the price. These brushes are accessible and widely praised for their effectiveness, making them a great choice for makeup enthusiasts of all levels.
Reader Favorites
When choosing a contour brush, it’s helpful to consider user reviews and recommendations. Often, the best advice comes from fellow makeup enthusiasts who have tested and compared various brushes. Look for brushes that consistently receive high ratings and positive feedback for their performance and durability.
FAQs
What is the best contour brush for beginners?
For beginners, an angled contour brush is often the best choice due to its ease of use and versatility. The angled design helps to follow the natural contours of the face, making it easier to apply and blend the product seamlessly.
Can you use a contour brush for other makeup applications?
Yes, contour brushes can be used for applying blush, highlighter, and even foundation in a pinch. However, having dedicated brushes for each application is ideal for achieving the best results and maintaining hygiene.
How often should you clean your contour brush?
It’s recommended to clean your contour brush at least once a week to maintain its performance and hygiene. Regular cleaning helps to prevent product buildup and bacteria, ensuring a smooth and flawless application every time.
What is the difference between contouring and bronzing?
Contouring is about creating shadows to define and shape your face, while bronzing adds warmth and a sun-kissed glow to your complexion. Contouring uses cool-toned products to mimic natural shadows, while bronzing uses warm-toned products to create a healthy, radiant look.
How do I know if I’m using the right contour shade?
When choosing a contour shade, aim for one that’s a couple of tones deeper than your natural complexion. Try it out on your jawline to make sure it casts a subtle, natural-looking shadow. The perfect contour color will blend in seamlessly, accentuating your features without looking too heavy-handed.